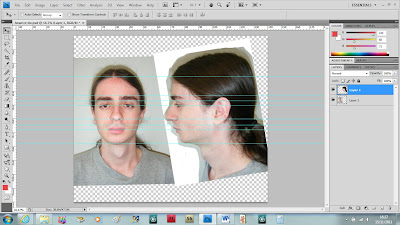
The next part of the head modelling is the texture painting stage. First open the uvw map image created in the uvw mapping stage in Photoshop. Create a new layer naming it guide and then give it a bright colour such as blue as long as it is a colour that is not found in the uvw map. Click on edit found on the taskbar then click fill to fill the colour on the image stage.
Hide the guide layer for now and select the entire background image and copy it. Select the guide layer back on then click on quick mask mode and paste in the background image into the guide layer. After pasting the image in come out of quick mask mode back into standard mode. Go to modify and select border. This creates a border around the select making it more visible.
Click on add layer mask, right click on the layer and select apply layer mask. This will finalise the layer.
Open the reference image used for the head; make sure that the reference image is a bit larger than the uvw map. Using the lasso tool select parts of the face and paste them into the uvw map, some resizing may be needed. When copying sections of the side of the head the section must be flipped horizontally and then it can be placed on the canvas.
Once the key areas have been added hide the guide and now start selecting the layers. First select the layer with the hair and go to image, adjustments then hue/saturation. Tweak the parameters of the hue and saturation so that the colour merges more with the colour of the forehead.
Once the toning is done turn on the auto select option and make sure that all of the layers are lined up as close as possible. Next go to edit, transform and select warp. This allows you to select a layer and warp it around matching up with the guide as close as possible. Also by using the erase tool you can remove some of the overlaps so that it merges together more.
Select all of the layers and then go to the layers drop down menu and select merge layers. This will put all of the layers into one layer.
Now using a mixture of the patch tool and the clone stamp tool the overlapping areas can be merged with the layers.
To fill in the gaps select an area of the face that most represents the empty space, copy and paste it then use the eraser tool to remove the area around the gap. Next select both layers and merge them together and use the clone stamp and patch tool to blend it more to the area around it.
Once everything is mapped out and all of the edges are merged save the image and transfer it over to 3D max. Open the material editor and import the image in, for now import all layers then add it to the face. From this you can see how well the image fits on the head.
From this I can see that the lips are a little off so back in Photoshop go to the filter drop down list and select liquify. Make sure that show backdrop is on, select the guide layer and make sure that it’s in the front mode. Select the forward warp tool and move the pixels around the lips to make the fit a little better. Once done save the changes and go back over to 3DS max to view the changes.
Next fill in the gaps using a mixture of the lasso tool, clone stamp and patch tools. Using these three methods the gaps in the head can be filled in. as both sides of the face are basically the same the lasso tool can be used to copy a large part of the face and pasted the other side.
Next render the image in the uvw maps located in the modify panel. This is the same method used to render the first uvw map. Make sure that it is in normal mode and then render it as an image. Open the image in Photoshop, resize the image and copy it over to the same file as the texture plate but on a different layer. Create a new layer just above this, select a bright colour that will show up on the image and select the brush tool. Lightly draw around the eye, nostril and mouth creating a guide.
Using these guides go back to the texture plate, hiding the normal plate and use the clone tool again to add texture around these new parameters. Use the brush tool again to fill in the eye sockets a deep shade of red and orange once the cloning has been done then use the blur tool to fill in the small space between the red colour and the skin texture.


